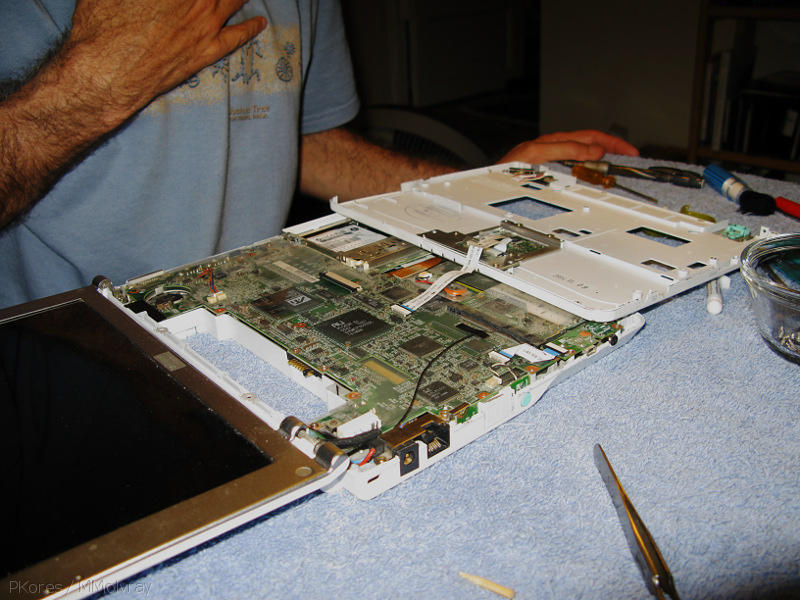
My original hard drive developed Issues. It was necessary to Take Steps. However, for a Sharp MP30 that’s the equivalent of needing to replace a fuel filter on a Ford Explorer. You shouldn’t have to take the whole machine apart to get at it, but you do.
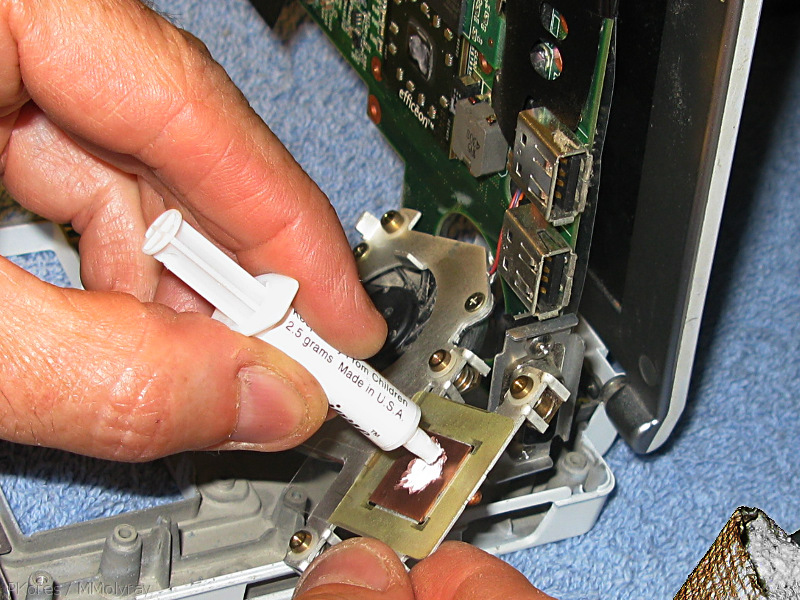
In the process of trying to get down to the hard drive, the CPU detached from its heat sink. Without one, CPUs last about 3 microseconds before they overheat. The old heat sink gunk had to be v.e.r.y c.a.r.e.f.u.l.l.y cleaned off, without breaking any less-than-hair-thin connections, the CPU surface polished back to smooth so the connection to the heat sink would be even, and glued back on with new heat sink compound.
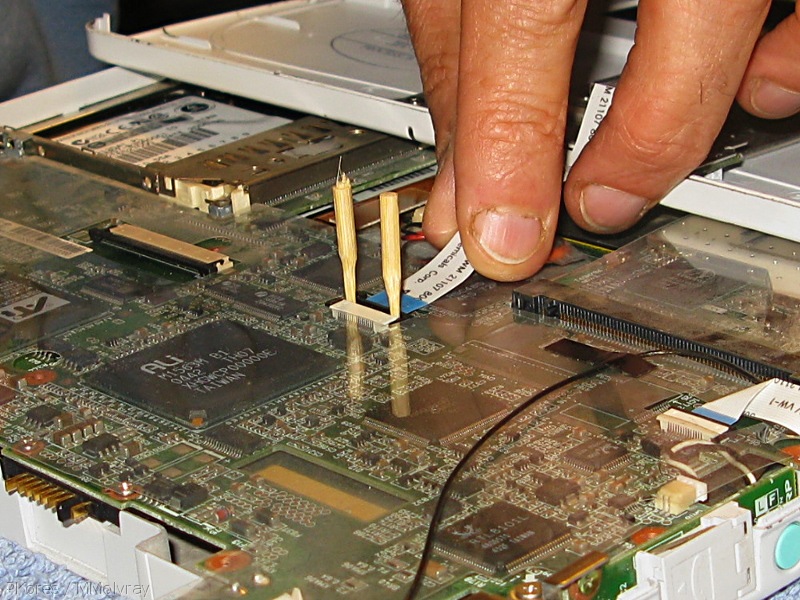
Reattaching the ribbon cables was a trip, too. The one for the keyboard was particularly interesting and required the fabrication of high tech equipment. (What you see there are the sharpened tips of bamboo skewers commandeered from the kitchen.)
The whole series of 15 pics is here [1], and once I have captions up, it’ll be easier to follow the whole process.
3 Comments To "Replacing a Sharp MP30 laptop hard drive"
#1 Comment By Arun On 16 Jan, 2009 @ 06:57
I never opened a laptop before, so I have no idea how much effort it takes to replace a part in a laptop. I have built desktop from scratch.
#2 Comment By Walter Stafford On 01 Feb, 2009 @ 13:15
This just what the doctor ordered! If you added a list of tools and some captions for each step, I would jump right in with a new drive. Is there a size limit (Gbytes)? I was considering a 320 gb drive.
Thanks in advance,
Walter
#3 Comment By quixote On 01 Feb, 2009 @ 18:29
Walter, I posted the pics because I figured that would push me to get the captions up, but, well, here we are, weeks later. The problem with the gallery, where most of the photos are, is that the captions wind up in tiny type underneath, and I was hoping to figure out a better method, and, and, and…. So no captions yet.
Hard disks: the important thing to remember is the little Sharps take PATA, not SATA drives. I believe the max size right now is 250GB (Seagate?). A couple of months ago it was 120GB.
Tools: think jewellers or dentists 😉 We used a micro phillips head screwdriver as used by opticians, and jeweller’s forceps. You may want 2 of the latter so you can hold down with one hand while moving bits and pieces with the other. The work was done on a towel so things wouldn’t roll away, and every little screw was put in various dishes or saucers so it stayed visible. Also, no such thing as too much light.
The biggest trick is to do with the keyboard. After you’ve removed the various screws on the underside that need removing, there are another two under the keyboard. The keyboard seems stuck. The thing is to take something like those two sharpened bamboo skewers, stick them in between the keyboard and the case near the screen side, and wiggle gently. The keyboard slides back a couple of millimeters and can then be levered up. Remove the two retaining screws underneath it, and you can fold everything out like in the first pic above.
The other important point when you’re taking the interior layers apart to get to the bottom one with the drive, is NOT to remove the screws that hold the heat sink to the CPU. We did by mistake, and wound up with the situation in pic 2. They don’t need to be removed. It only feels like it because by that point you just want the damn thing to come apart!
Getting the ribbon cables reattached (pic 3) is more like neurosurgery than computer tech.
Good luck! Let me know how it goes. I’ll be glad to help long distance if I can. Us Sharpies have to stick together.